Monday, May 15, 2023

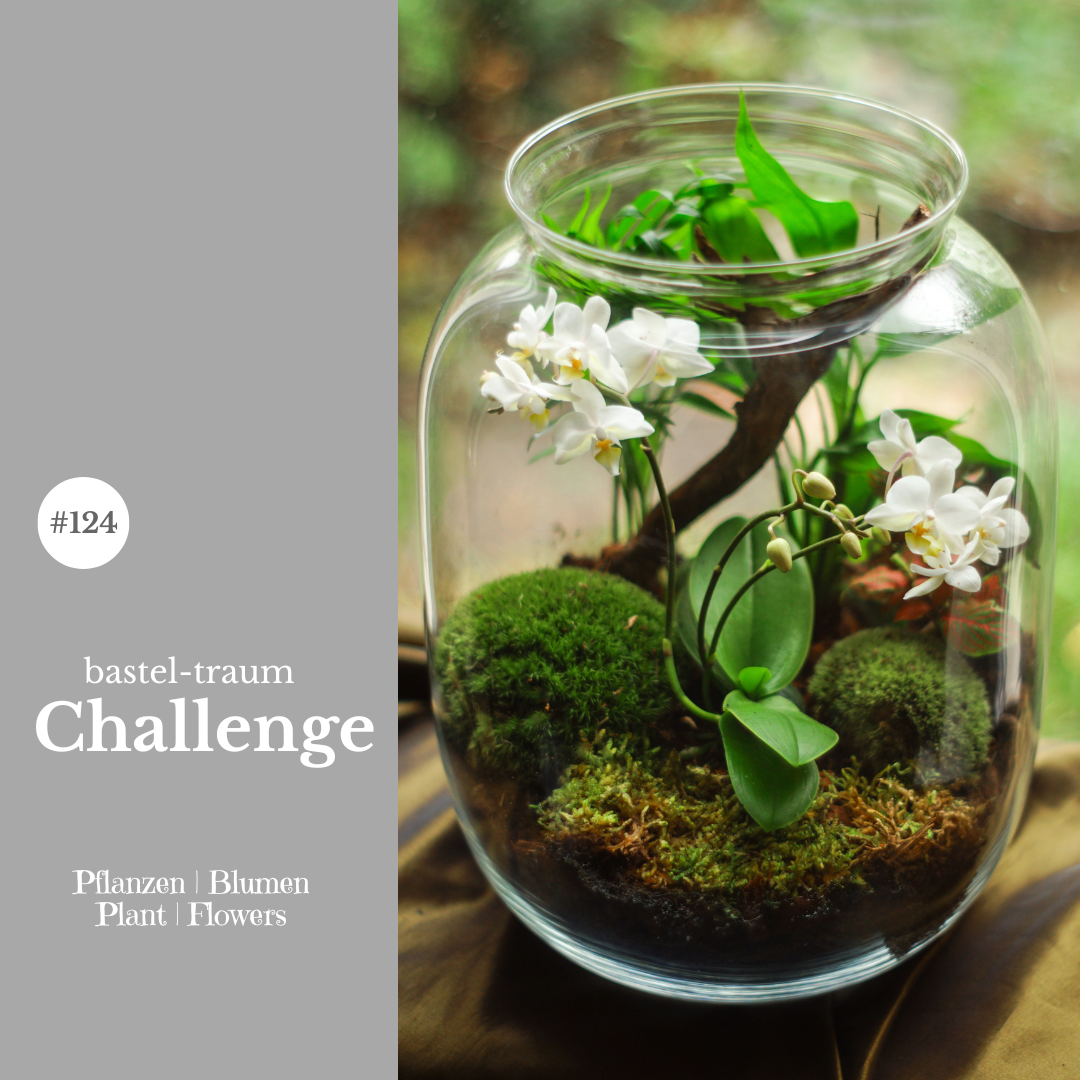
Basteltraum's Challenge #124: Plants & Flowers


Hi everyone!

We are back with a new challenge over at Bastel-Traum's blog and this time it is all about flowers! I went for a super quick and easy yet beautiful card, using a 3D Embossing Folder and colored it with regular watercolors and some colored pencils for a few details. A pretty scripty sentiment completed my design, followed by a few rhinestones - voilà! :-)

I hope you will play along with us - there are fun prizes to win!

Thanks for stopping by, happy crafting and warm hugs!

Products I used:

Altenew | Botanical 3D Embossing Folder Delightful Frame
Altenew | Watercolors 36 colors
Florence | Smooth Watercolor Paper 300g
Picket Fence Studios | Crystalline Diamonds


Wednesday, March 15, 2023

Basteltraum's Challenge #123: Celebrate!


Mama Elephant | Slim Scenescape Builder
Mama Elephant | Slime Scenescape Rainbow Add On
Lawn Fawn | Slimline Cloudy Stencil

Hi, crafty friends!

It is mid of March again (already, omg!), so that means a new challenge over at Bastel-Traum's blog just has started. This time, it is all about celbrations! 

I went for a slimline pop-up card. The recipient is a patient boulderer, so I was asked to create a card including his hobby, especially as he will get tickets to join the world master show. The bouldering boy is hand drawn, also the boulder rocks background paper (made with procreate) I used to decorate the outside of the card. And since Frederik (the recipient) is from the Canton of Wallis, I got asked if I can include the famous mount Matterhorn - of course I could :-) I have simply drawn it by hand off a digital photo. I made an extra pocket behind the big background panel to create space for the ticket.

I hope you will join us with this fun theme - you can win cool prizes, too! Be sure to check out the blog of Bastel-Traum for more information.

Thank you for stopping by and haning out with me for a little while - see you soon!

Big hugs,


Wednesday, February 15, 2023

Basteltraum's Challenge #122: Color Scheme


Hi, crafty friends!


Time is flying again and another monthly challenge has started over at bastel-traum's blog. This time, it is all about a specific color scheme but it has SO many colors included, you can literally go wild!!

I used a pine forest layering stencil from Altenew to create my focal point. The softer colors in the background are made with dye inks, the dark one in the foreground is made with distress oxide to get a bold, opaque look. The sky is also brushed on with some dye ink. So how did I create the splatters? Well, not with water, obviously :-) But there is a great product called "brush ex". It contains a bit of bleaching agent and with this the color will immediately disappear where the droplets hit the paint on the paper - it's like magic! Much faster that with distress colors and water. This also can be used with watercolors by the way. I simply love that stuff :-)

Except of the sentiments, everything on the card is on one layer. The sentiment "love" is a super old one by Sizzix and I couldn't find it anywhere. So I put an alternative down below in the supplies list. And the tiny "Sending" is simply made on my computer and laser printed onto thick paper. Then I cut it into a thin line and brushed on some dye ink to match the color with the rest of the card.


I hope you will play along with us - there are always great prizes to win and - most important of all - a lot of fun to join!


Happy crafting!


Sunday, January 15, 2023

Basteltraum's Challenge #121: Winter


Hello, my friends!


Welcome to the new year! I hope you had some nice and relaxing days off during the holiday season. So as we don't have any snow yet, what better to start into the new year with a challenge that is all about winter!


My card is cut from only one die (unfortunately it is already retired but I am sure you will find something similar in your stash) and backdropped with a sponged distress oxide panel. A wintery sentiment, heat embossed with icy blue embossing powder, makes my card complete. Voilà, there you have a super quick and cute winter wishes card.


You will find even more inspiration over at Bastel-Traum's blog and also what you can win.


I hope to see you there and your beautiful creation!

Thanks for stopping by and have a lovely day!


Crafty hugs,


Creative Expressions | Winter Woodland cutting die (retired)
WOW! | Metalline First Frost
Your Next Stamp | Winter Wishes
Ranger |Distress Oxide Tumbled Glass
Ranger |Distress Resist Spray


Thursday, December 15, 2022

Basteltraum's Challenge #120: Glitter


Hi, crafty friends!


Wow, this is the last challenge for 2022 - where did this year go?! And to be honest, I am far away from being prepared for Christmas! So my inspiration for the current bastel-traum challenge might come handy for you! These are quickly made paper lantern that make a beautiful decoration on a window sill! Or you can hang them infront of a window with a thin nylon twine, looks super cute, too. These will be a gift for my daughter's godmother. Maybe you might need something similar as a Christmas gift, too? These are made super fast! No coloring involved this time, haha :-) I only used shiny, pearly silver cardstock and some glittery cardstock for the deer and squirrel. The rest makes that handy die set by Sizzix (unfortunately basteltraum does not carry it anymore, but I am sure you can ask Tom, the owner, for ordering it for you :-) ) You will find all products in links down below.


The "windows" are covered with thick vellum paper - this way, the light looks so pretty! So all you have to do is diecutting, folding along the score lines (the die makes that for you) and glueing all pieces together - voilà!


I found some super cheap electric LED tea lights for inside the lanterns - you cannot use regular tea lights because the lantern is closed on top - I am sure you will find one somewhere else near you (dollar store or etc.)


Okay, I hope you got inspired and you will play along with us - you can always win amazing prizes!


See you over at bastel-traum's blog!


Thanks for hanging out with me and - Merry Christmas & a happy new year!!


Crafty hugs


Anita's | Plain White Vellum Paper
X-Cut | Glitter Sheets A5
Lawn Fawn | Metallic Cardstock Silver
Tombow | Mono Multi Liquid Glue
Sizzix | Woodland Lantern 665490


Tuesday, November 15, 2022

Basteltraum's Challenge #119: Snowflakes


Hello everyone!

Wow, it's mid November and only 5 weeks left until Christmas! So if you didn't start making Christmas cards yet, it might be a good opportunity now :-)

The latest Bastel-Traum Challenge is all about snowflakes. I created a cute and simple card which is nice for mass producing but still looks festive and elegant.

I diecut a piece of watercolor cardstock and brushed some distress ink in tumbled glass on it. Then I grabbed my Snowflake stencil and brushed again with tumbled glass over it. A quick dry with my heat gun, then I spritzed some water over the panel, dried it again and spritzed a few droplets of liquid stardust for the extra sparkle.

The "merry" sentiment is a retired one from MFT, but you can go for any similar sentiment that is stacked vertically, there are so many out in the market - and I am pretty sure you will find something in your own stash, hehe :-)) I diecut it from red sparkling cardstock and glued it down with liquid adhesive. The snowflakes are also diecut from sparkly white cardstock and adhered with liquid glue. Now I glued my panel onto a folded red card cardstock (do this BEFORE you add liquid embellishments ;-) ) To finish off my panel, I put some clear nuvo drops allover the panel for the extra sparkle.

I hope you will play along with us and I will see your creation over at Bastel-Traum's blog!

Happy crafting and a big hug,


Saturday, October 15, 2022

Basteltraum's Challenge #118: Oh Christmas Tree!


Hello everyone!

Can you believe it?? It is already mid October and there are only 71 days left until Christmas! This might sound still a lot, but you know exactly how this works with prepping, crafting and so on and so forth... all of a sudden it's here and we are in a hurry!

So better start now than later with making Christmas cards, right? So the best opportunity to get inspired is playing along with the next Bastel-Traum challenge! It is all about Christmas trees, falalalala! :-)

I used a stamp set by Lawn Fawn (you will find the link down below) to create this adorable and cozy living room scene. I colored everything with watercolors and colored pencils. Then, my plotter did the fussy cutting for me (heck yes, so worth the investment, it's such a time saver!). The background is made with different patterned papers, I just papier pieced the floor/carpet, skirting and wall together on a white cardstock panel. Then I just put all the images onto my panel with tiny pieces of foam tape. The sentiment is heat embossed with white embossing powder. To match the carpet, I painted a white piece of cardstock with the same red watercolor and heat embossed over this after it was completely dry. The frame (yes, it's literally a frame, hahah :-) ) was diecut with a rectangle die, but I only cut off the edges with the cute dotted line and glued this super thin stripes around my image.


I hope you got into a kind of Christmas mood and I will see your creation over at bastel-traum's blog!


Thanks for stopping by and happy crafting!


Thursday, September 15, 2022

Basteltraum's Challenge #117: Autumn


Hello, crafty friends!


How are you? Fall is almost here, temperatures are not that high anymore and in about a week, fall is starting officially around here. So what better than to play along in the latest bastel-traum's challenge when it is all about autumn/fall?!

My creation is pretty simple! For the background I used an embossing folder to create a wooden background. By the way, you will find all products I used linked below at the very end of this post. Okay, another helpful tip when it comes to embossing: a teeny tiny spritz of water onto the paper before embossing prevents the paper from cracking. And the embossing will be even more clean and crisp. Yay for that! :-)

Then I added some gold splatters (it's a watercolor pigment powder that you just have to dilute with water and your ready to go) for the extra shine. Then I diecut an oak leaves wreath out of watercolor cardstock. This die is super old, I believe it was from Memory Box. I put you an alternative product into the links you might use instead... Okay, I colored the wreath with regular watercolors (in half pans) in fall colors. I went over several times to achieve a good blend of colors and the leaves appear also more vivid when putting more pigment on it. 

Then I heat embossed several different sentiments with versafine black onyx ink onto 125g vellum. some of the sentiments are cut in stripes and adhered on the back of the panel. For the round sentiment I used transparent glue (the one from Nuvo works great with vellum!)- Then I adhered the wreath with foam tape on top - this gives the extra lovely depth to the card, love that!

As a finishing touch, I added a twine bow in a natural color - makes such a difference.


I hope you got inspired and will play along with us!


Thank you so much for stopping by and have an amazing day!


Crafty hugs,


Products I used (or an adequate alternative)


Monday, August 15, 2022

Basteltraum's Challenge #116: Into the Woods


Hello everyone!


Summer is still in its full glory (yes omg, we are having the next heat wave around here 😆​ ) so I was not able to create something that goes into the fall-ish direction, althoug the this month's theme on basteltraum's blog is "into the woods" might totally indicate that :-) But if you are in the autumn mood already, go for it :-))

So my inspiration was a night sky I saw lately in real, it had such beautiful purple shades! I simply had to recreate it :-)

I sponged some different shades of purple and black onto a piece of watercolor cardstock (you find all the colors and cardstock at the very end of this post) and spritzed some water for lifting up a bit of the ink. I let it dry for a moment, then I splattered some white liquid watercolor ink (I used ecoline ink) on it while covering most of the panel with some copy paper. I cut an uneven line to mimic a milky way... you might take a look on my snapshots for better instructions, hehe :-)

Then I added some more white stars in the night sky with a Posca marker. Let it dry for a while, it's worth it. Otherwise the paint will smear.

Then I painted freely some pine tree silhouettes over it. Begin the the stem, then add the branches by tapping the paint brush very slightly back and forth. I used regular black acrylic paint for this, nothing fancy :-) 

The sentiment "Birthday wishes" (it was promotional stamp sold with a Big Shot machine) is heat embossed with a very fine detailed embossing powder.


I hope you got inspired and will give this round a try! I cannot wait to see your creation over at basteltraum's blog!


Happy crafting!


Products I used:


Wednesday, June 15, 2022

Basteltraum's Challenge #114: Things with Wings


Hello everyone!


Oh dear,  almost half a year is over, isn't that crazy?!? Summer is knocking on the door in the past few days around my area and we all feel the urge being outside, soaking up the sun and enjoying the warm weather!


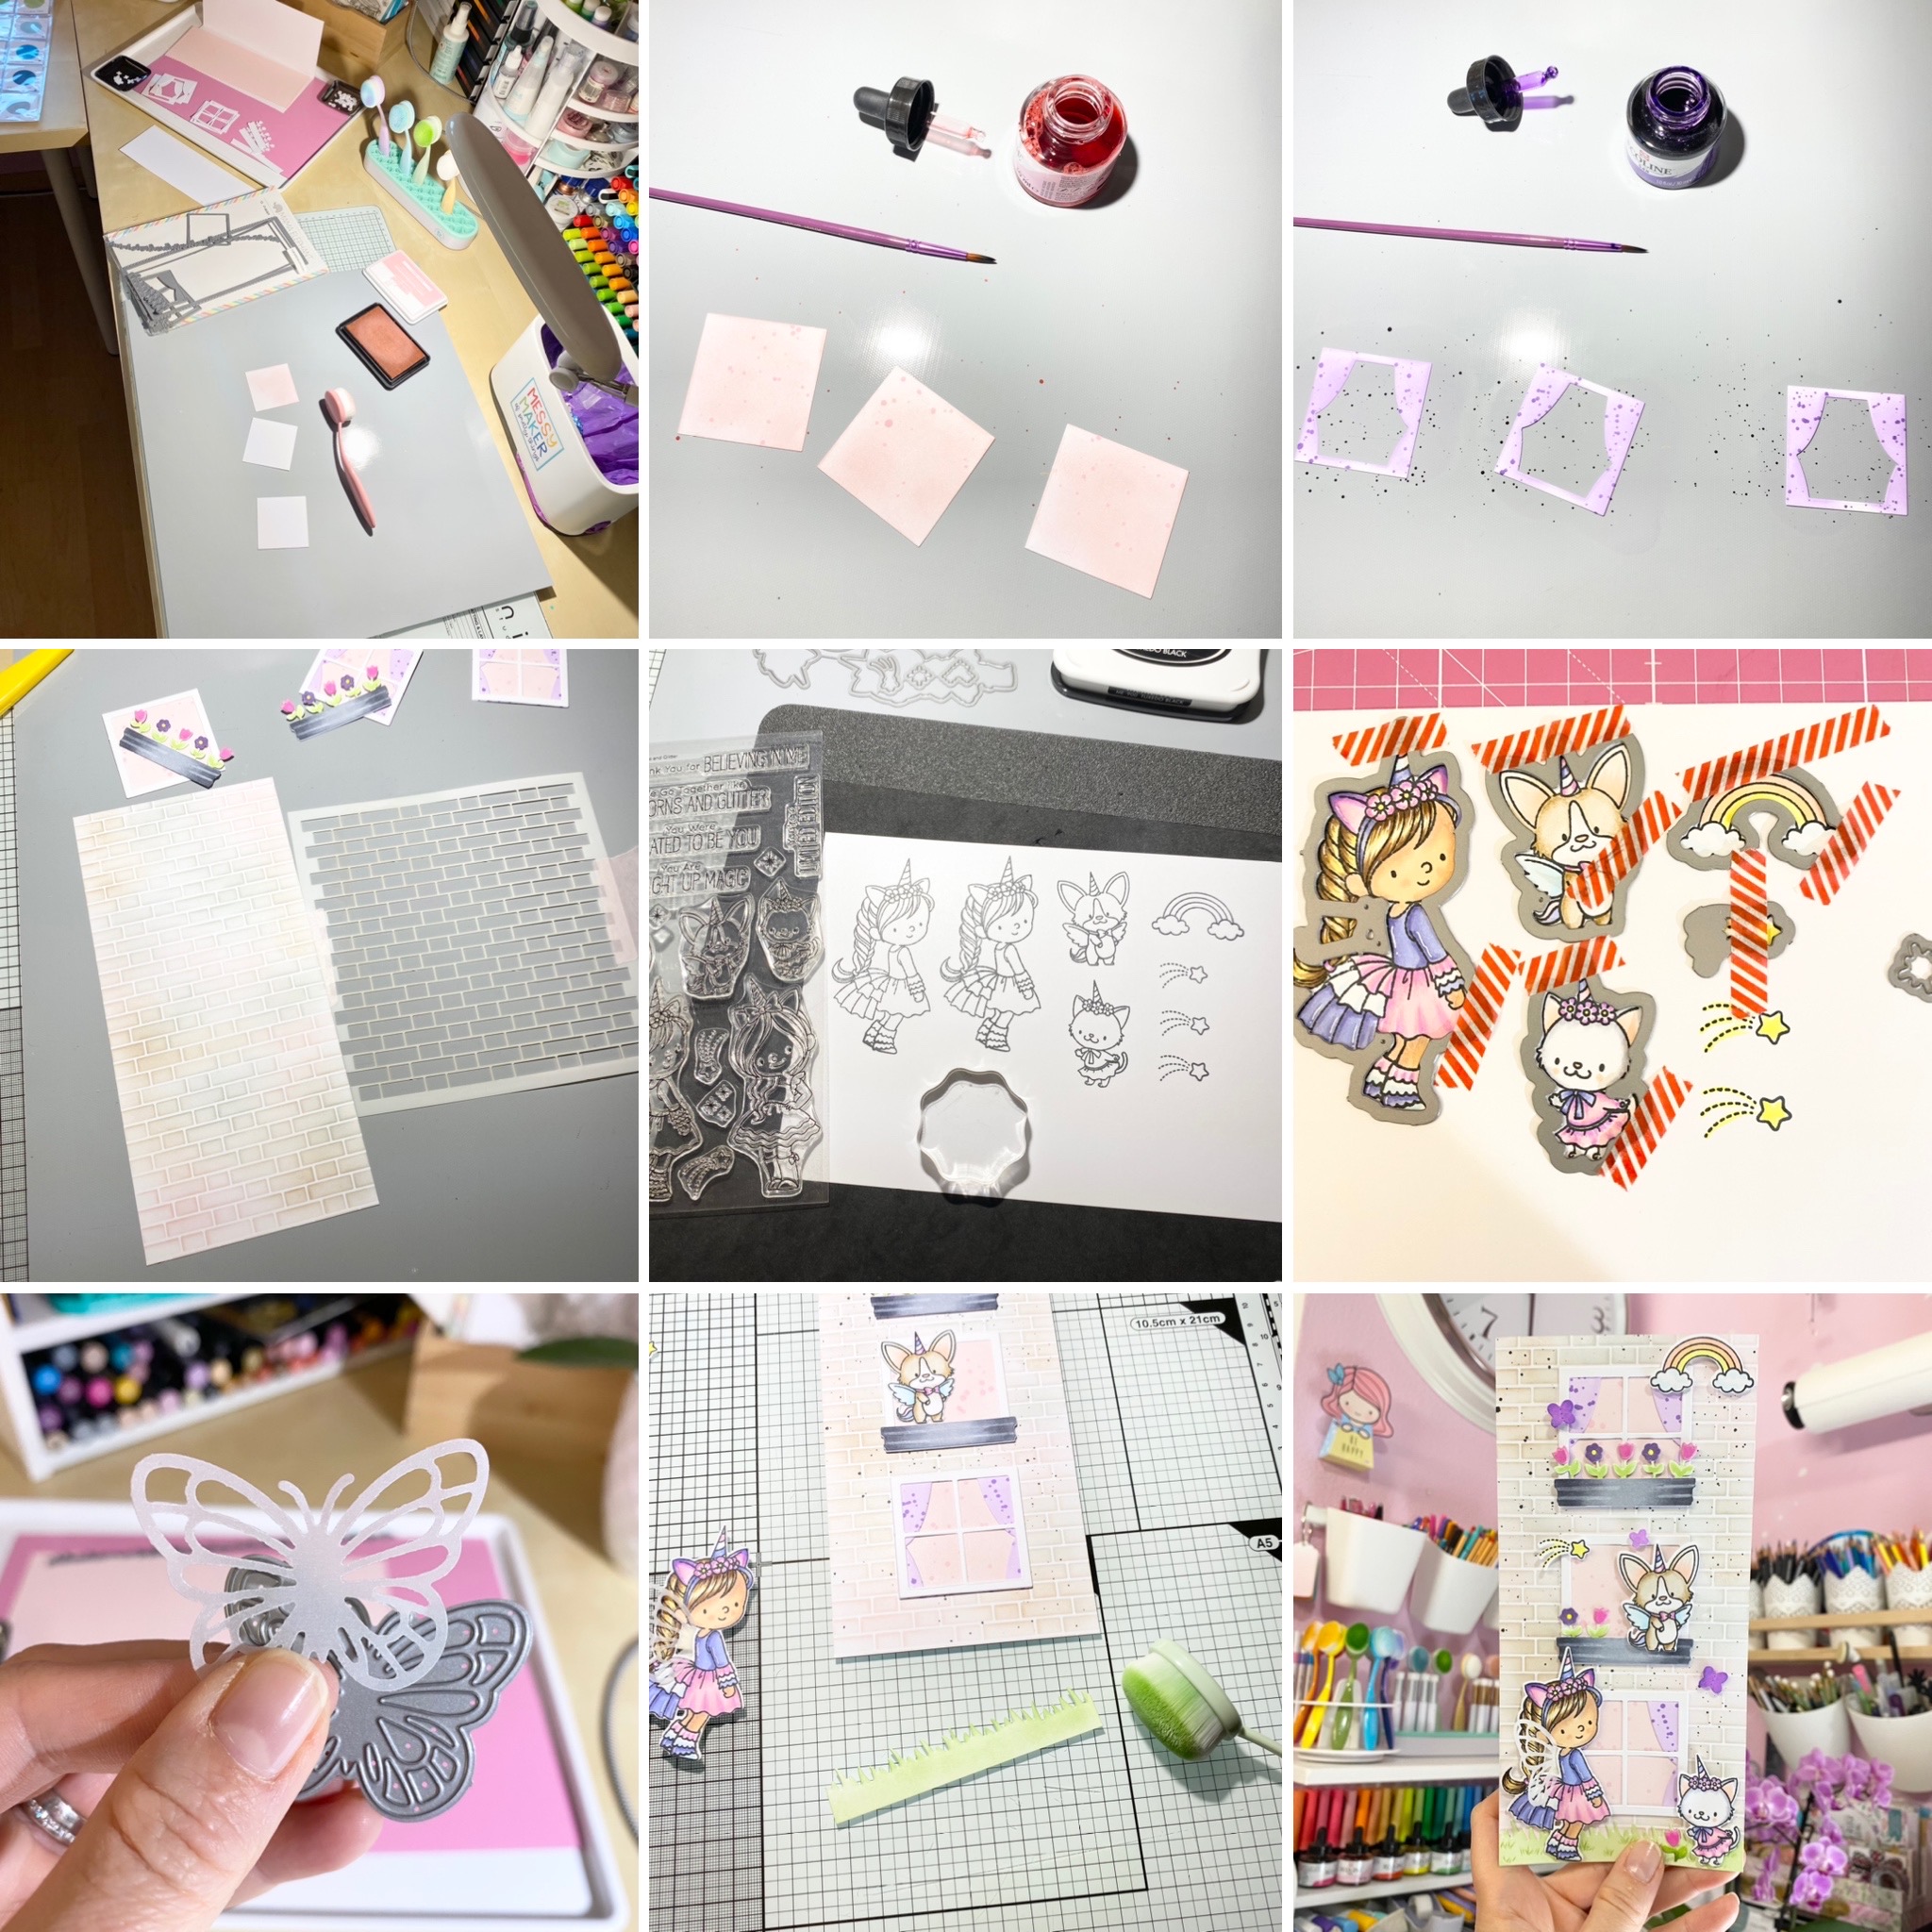
But nevertheless I found some time to bring you some inspiration for the latest challenge over at Bastel-Traum's blog which is all about "Things with Wings" this time, yay! You really can be super creative or taking it easy with the wings topic. I used a stamp set by My Favorite Things calles "Unicorns and Glitter" . The little doggie already had some wings, but not the girl. So I grabbed a butterfly die from Lawn Fawn and cut out some wings for her back. The images are all colored with Copic markers. The background and window elements are brushed with Lawn Fawn dye inks (ballet slippers, fresh lavender, celery stick, doe, and manatee) and some liquid watercolor splatters over it (I used my ECOLINE watercolors for this). The background wall is stenciled with the same colors and as a finishing touch also some black watercolor splatters over it. 

Then I glued everything down - the windows with liquid glue and the images with foam tape for more dimension.


I don't know yet who will get this card - probably a lovey little classmate of my daughter, haha :-)


I hope you got inspired and will play along with this fun challenge!


Thank you for stopping by and hanging out with me! Crafty hugs,


Sunday, May 15, 2022

Bastelraum's Challenge #113: Summer


Lawn Fawn | Slimline Tropical Leaves Border
Lawn Fawn | Tropical Leaves
Ranger Ink | Distress Oxide Rustic Wilderness
Ranger Ink | Distress Oxide Mowed Lawn
Ranger Ink | Distress Oxide Forest Moss
Karin Brushmarker Pro 60 Set + Blender
Florence Watercolor Paper smooth
Ranger Ink | Distress Glaze Kitsch Flamingo

Hello everyone!

May is in full swing and it seems summer is coming slowly but steadily! So we could not have a more fitting theme for this month's challenger over at Bastel-Traum's blog :-) It's all about summer themed cards. So let's pull out some watercolors and inks and get a fresh and yummy card!


I stamped some popsicle images (whatever you have in your stash, mine are from Altenew, a rather older set) and colored them with pastel watercolors. Then I fussy cut them by hand (fun fact: since years of cardmaking, I learnt to enjoy the process of fussy cutting, it really has something meditative! I hated it at the beginning :-)) ) 


Then I scribbled with my Karin Brushmarker (in rainbow order, of course) onto a panel of watercolor cardstock and blended everything with a big paintbrush (it can hold a lot of water) and dried it with my heatgun.


Then I used some more watercolor paper to cut out some leaves and a tropical leaves border. I used different distress oxides (mowed lawn, rustic wilderness and forest moss) to color everything. Some frangipani and hibiscus flowers from an older set by My favorite Things completed the decoration. The aloha sentiment is by Lawn Fawn and I heat embossed it with Distress glaze (color: kitsch Flamingo). A second cutout of fun foam gives the sentiment more dimension and the extra pop! 

I used some foam tape to adhere all of the popsicles, the leaves and flowers are adhered with regular liquid glue.


I used  a white acrylic paint maker (I used a Posca) for putting some random white dots allover the background - there you have a super summery card!

Thank you so much for stopping by and hanging out with me! I hope you got inspired and you will play along with us! You also can win a shopping voucher about CHF 25.00, wohoo!


Happy crafting! 


Hugs, 


Friday, April 15, 2022

Basteltraum's Challenge #112: Pimp your post-it / Notebook!


Hello crafty friends!


Ahhh, spring really has arrieved, and also  Easter is practically happening right now :-)


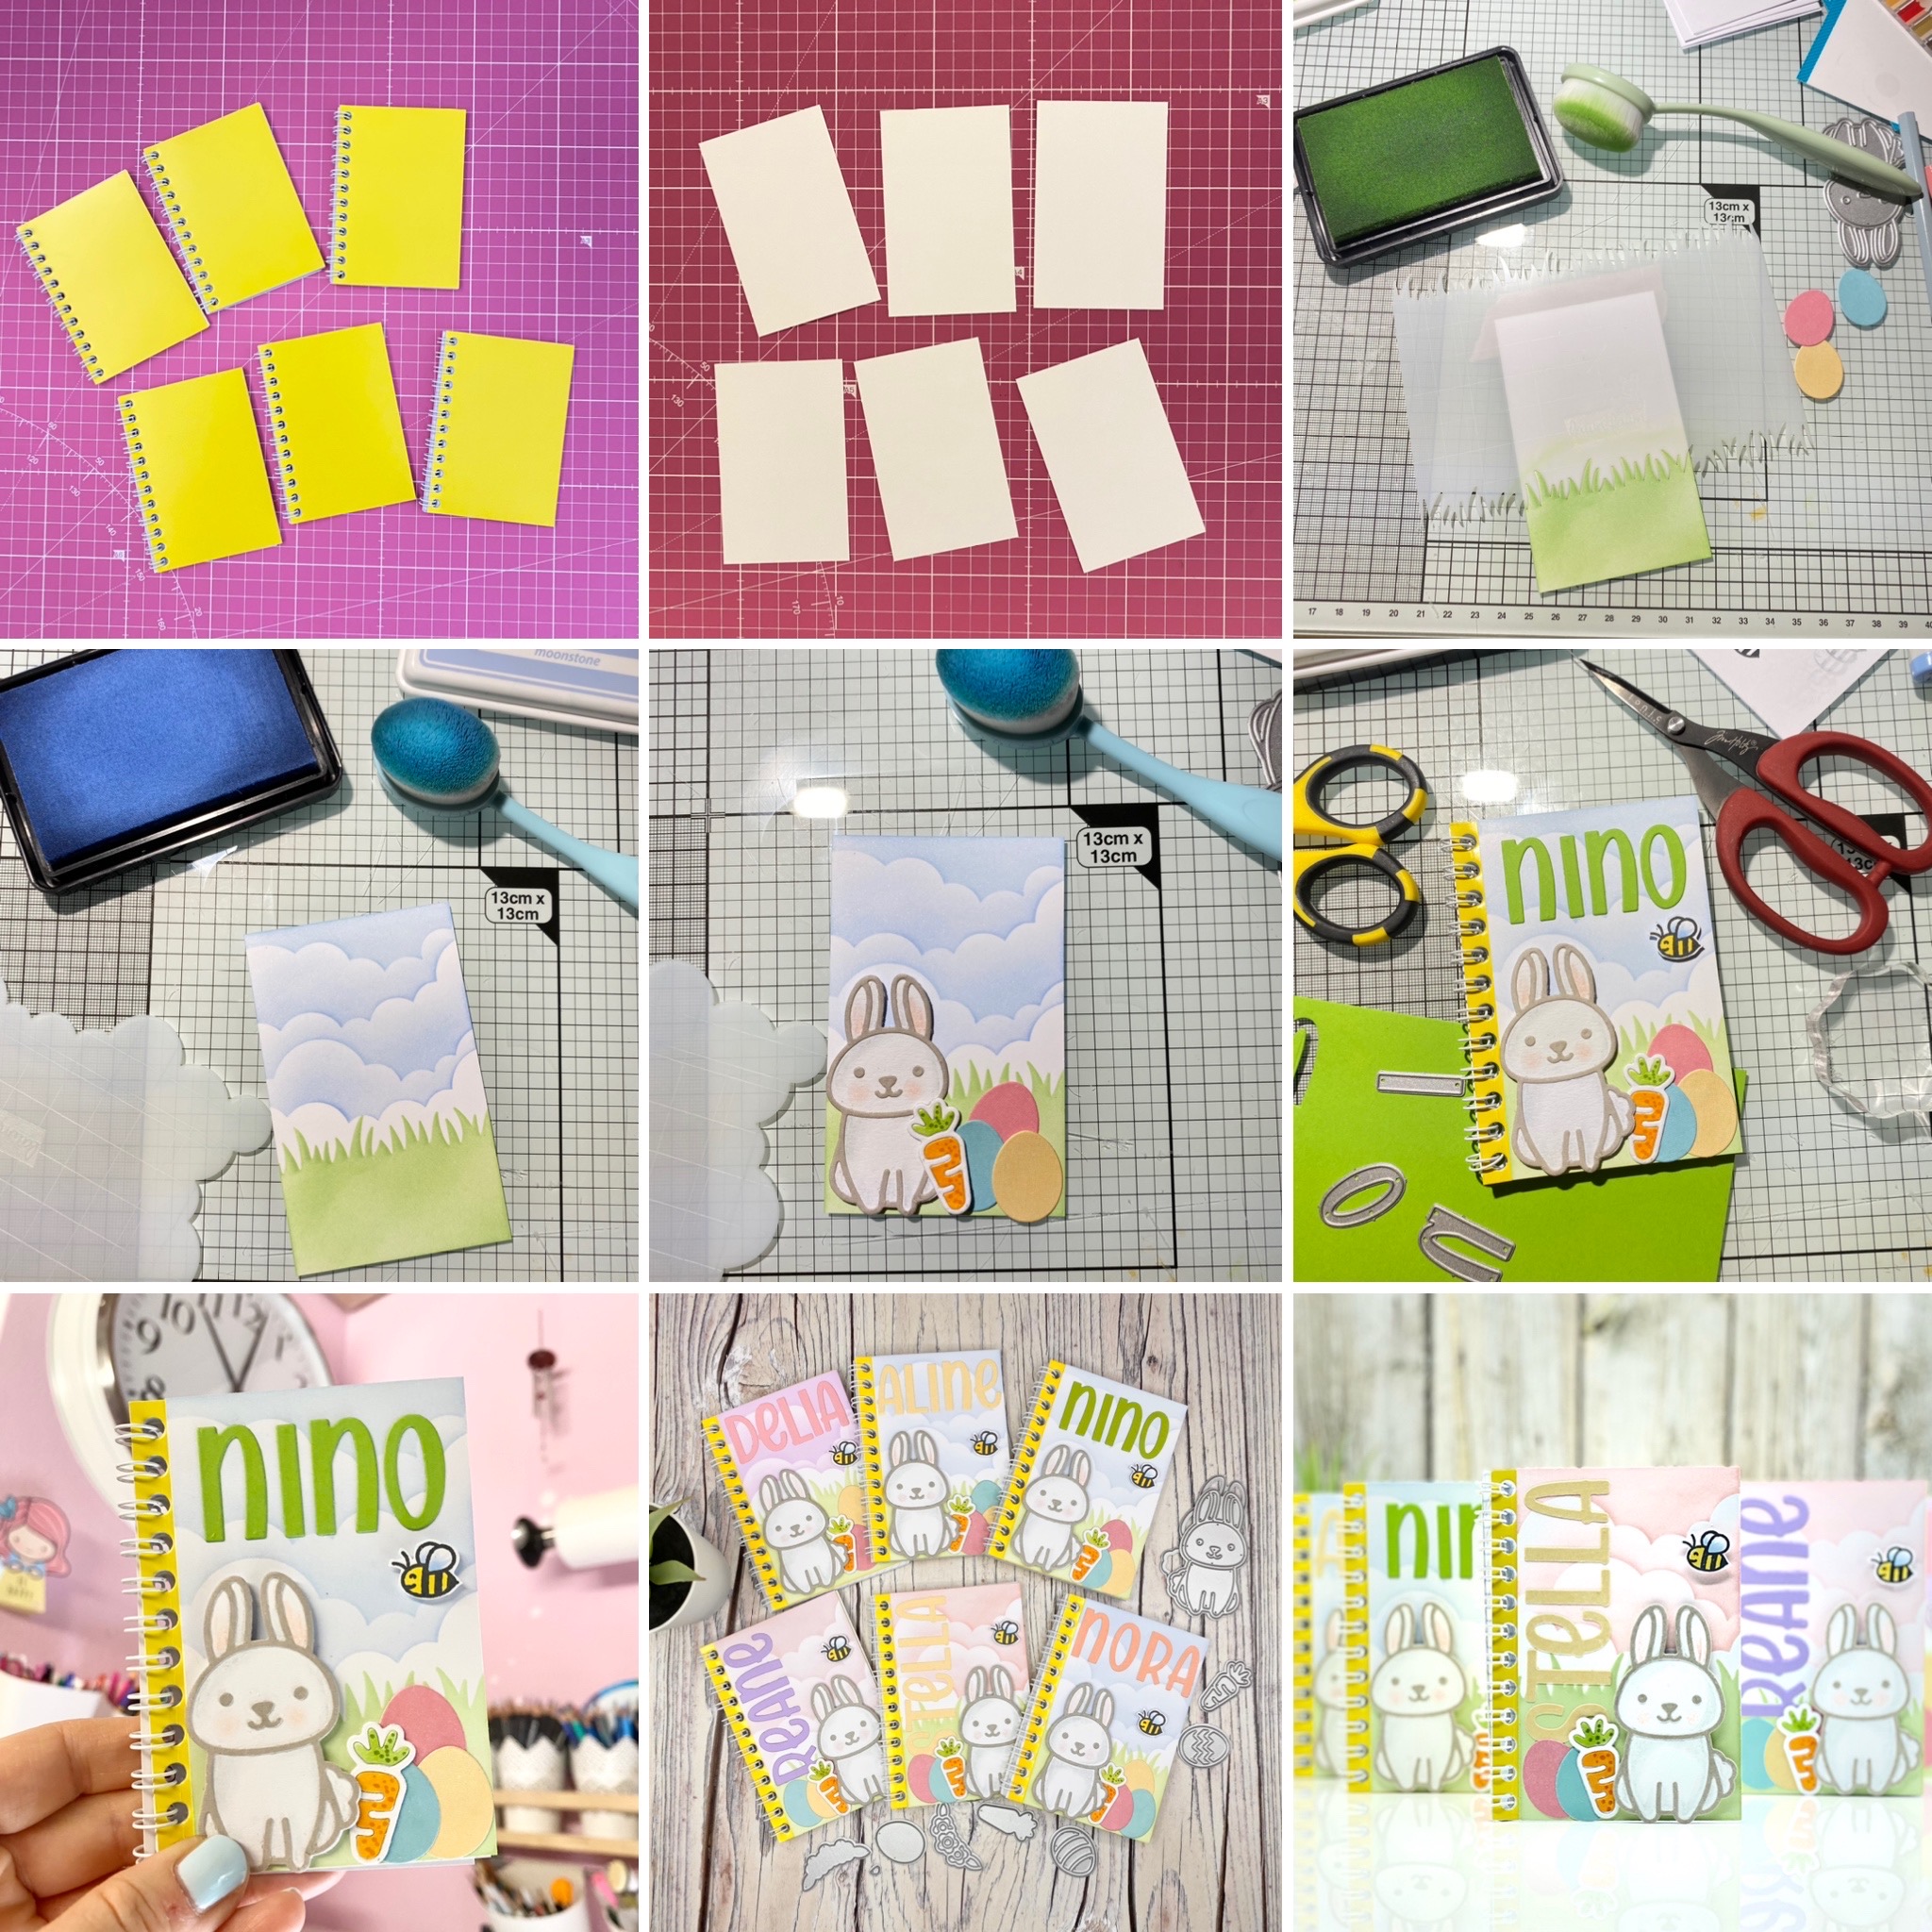
So I thought I'd share with you what I made for all kids for Easter Sunday. And it fits so nicely to the bastel-traum's theme this month. Share with you how you pimped your post-it or notebook! 


I bought some little cute notebooks and decorated the front with a cute panel full of cut-outs and personalized them with the kid's names. Then I packed them into little cellophane bags and filled them with bits and pieces of ephemera :-) Do you agree, they are so cute, arent' they!!

You find all products I used linked down below.


Happy Easter and happy crafting!


Thank you so much for stopping by - I cannot wait to see what you will come up with!


Hugs,


Lawn Fawn | Springtime Bunny
Lawn Fawn | Henry's ABC's
Lawn Fawn | Grassy Stencil
Lawn Fawn | Celery Stick ink
and other Lawn Fawn inks!


Tuesday, February 15, 2022

Basteltraum's Challenge #110: Color Scheme


Hello crafty friends!


I hope you are all fine, so am I! :-)


I barely can believe it but it is February already, eeeek! I feel like it was just yesterday when we raised our glasses on Sylvester night, right?!


Ok, back on track to our latest challenge over at Bastel-Traum's blog. This time, we have beauuuutiful color scheme to play with for you - isn't it fantastic?!


So I went for this adorable skunk and that super cute envelope card holder from Lawn Fawn latest release. If you want to know in detail how to assemble the skunk, I really recommend watching this tutorial. I colored my skunk with copic markers (at the beginning, it was all plain white paper).


I sponged some spun sugar (Distress oxide) over the windy backdrop panel and drew some dots with a pink pencil to create even more interest.


The tiny envelope ist just made by a folded piece of paper and a little diecut heart for the closing. The rest of all other paper pieces is made by colored cardstock.


You will find all product links at the very end of this post.


I love how it turned out - those colors are so delightful to look at!


I hope you will play along with us - and oh! You definitely need to check out all other projects from our design team, they are fabulous!!


Thanks for stopping by!


Happy crafting & big hugs,


Products I used on this project:


Lawn Fawn | Tiny Gift Box Skunk Add-On
Lawn Fawn | Gift Card Heart Envelope
Lawn Fawn | Scent with love (sentiment)
Lawn Fawn | Stitched Windy Backdrop
Distress Oxide | Spun Sugar


On Instagram

© Papierlisi. Made with love by The Dutch Lady Designs.