Saturday, July 15, 2017

Basteltraum's Challenge #55 : Color scheme


Hello fellow crafters!

Have you been on holidays already? Or are yours coming soon?? Well, mine will start tomorrow! We are going to Italy for one week, I am so excited!!

But first I have to announce an new challenge for Basteltraum. This time it is all about colors. You are totally free what subject on your card will be, just use one (or even all) colors of the inspiration image! (You will see it at the very bottom of this post).

The stamps and dies I used are all from Lawnfawn this time. I diecut everything from white cardstock and colored in all pieces with my copic markers. The background is sponged with a finger dauber and two different dye inks, also by Lawnfawn (butter and fake tan). The cute owls are colored with copic markers, too. I really enjoy creating scenes like this one, although it takes me quite a lot of  time to figure out my final design, lol. But that's what cardmaking is all about, being creative, right??!

So I would love to see you playing along with us!

Enjoy the summer!

Crafty hugs,


Wednesday, July 12, 2017

Birthday happy mail for a lovely friend


Hi guys!

Today I have a very special card for you. First, because it is for a very sweet and special crafty friend of mine, sweet Steffi. So again, happy happy birthday to you, Mausi!! And this brings me to my card for her. As we call each other "Mausi" (which means "mousie" in German) this digital stamp seemed PERFECT for this occasion! You can find that image over on Isabel's etsy store and many more adorable digital stamps. Isabel is crazily talented and super sweet. And I am so proud to call her as dear friend of mine, too. So you might check out her instagram feed too, she creates so many adorable things!

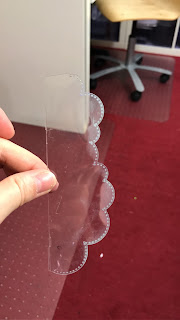
I wanted to create something special for Steffi, so I went for a flexible shaker card with no bulk at all. I used my fuse tool to create a pouch for my shaker elements. This tool is super handy and so easy to handle. I definitely can recommend it! I filled my pouch with all those tiny bits and pieces and closed it with the final fusing line. So easy!


As the whole front will be transparent, I had to create a back part of the hot air balloon. But Isabel made it an easy job, as she did include the back side of the mouse in the digi stamp set. So I cut out the mouse and adhered it to the plain hot air ballon. Voilà, here is my backside! ;-) The images are all colored with my copics. The cloudy sky is sponged with Disdress oxide ink (broken china). I have to admit - those inks are GREAT for seamless blendings!  They flow like butter ;-)

I diecut an extra frame out of white cardstock for sandwiching my shaker pouch between the card base and that frame. I used a very strong tape adhesive, I think this works best for such small and thin areas.

Then I glued the hot air balloon onto the pouch and the back on the inside onto the pouch and voilà - here is my special birthday card for Steffi! :-)

I hope you like it and you will give it a try as well!

So I just hope my card has arrived today and Steffi will like it, too!

Thanks for stopping by and have an amazing day!

Hugs,


On Instagram

© Papierlisi. Made with love by The Dutch Lady Designs.